You’ve gotten the training and now you’re ready to build that home studio so you can get your voice-over career off the ground. Prepare for liftoff by avoiding these mistakes that everyone starting out makes in their home studios.
Mistake #1: choosing a space with bad acoustics
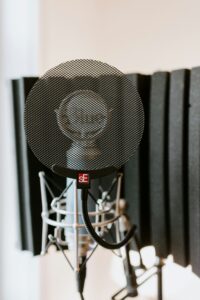
A booth doesn’t need to be expensive, state-of-the-art, or even remotely impressive. It does, however, need to be quiet. That’s why the first mistake everyone makes is recording in a room with hard, flat surfaces. Sound is like a super ball, and your goal as a booth constructor is to make sure there are no surfaces that would give you a good bounce. That’s the reason soft, dense, and textured surfaces like carpet, moving blankets, and velvet curtains are great. Not only do they dampen or soften the sound, they have textures that break up sound waves on a microscopic scale. So no, you don’t need to line your walls with Auralex foam.
Mistake #2: noisy equipment in the booth
A lot of people use their closets as a booth – which is great. Clothes can also be good baffling, and they’re already hanging up. But here’s where the next mistake happens: you put all of your equipment in the closet, didn’t you?
It usually looks something like this: your noisy computer is right underneath your microphone and you’ve got your back to the rest of your wide-open room. The microphone records what’s in front of it, so putting soundproofing behind it is useless, especially if it’s recording your computer’s fan and all of the room noise behind you. Turn it around. Put yourself in the closet so the mic records you in the soundproof enclosure and keep the equipment spaced far enough apart so that you don’t get that annoying whirring sound. People always forget that in professional studios, there’s a big pane of glass in front of you. Most microphones are engineered to cancel out the sound in back of them, so please, please don’t buy a mic shield that goes in back of the microphone. It’s not doing anything – unless…
Mistake #3: not understanding your microphone
There are a few different types of mics with different polar patterns: cardioid, omni-directional, and bi-directional. This tells you the shape and direction of the microphone’s signal. Without getting too deep into it, stick with cardioid for voice-over. It puts the strongest reception in front of the microphone, with the signal getting weaker on the sides and in back. Omni and bi-directional put out equal strength signals for things you aren’t recording.
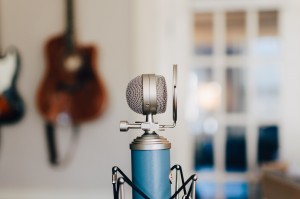
Or, did you buy a ridiculously expensive microphone that you don’t know how to use? Do you know why you bought the mic you did? If your studio is for producing broadcast-quality work that will be used as the final product, you’re right to buy equipment that will give your clients the sound they want. A big part of that sound is the pre-amplifier that processes your sound before it gets to your computer. USB microphones let you plug into a computer directly, but sometimes to the detriment of the sound. Pre-amplifiers give traditional XLR microphones the extra power they need, compress the sound, and allow you to plug into your computer.
On the other hand, if you’re just auditioning in your booth for jobs that will be professionally recorded later, the acting matters more than an ultra-clean, super-processed movie-trailer sound. In that case, see how far you get with a USB mic.
But the mistakes don’t end there.
Mistake #4: over-treating audio in software
Audio software comes with a slew of new problems for people just starting out, and commonly these relate to effects and audio treatment. Check to make sure there’s no reverb or echo on your voice. If you do normalize or compress your sound, make sure you don’t completely blow out the sound so that the waveform becomes totally flat on the top and bottom. Unless you really know what you’re doing, filters and effects do more to hurt auditions than help them.
My golden rule: filters shouldn’t change the sound, they should clean it.
So if you have the option to GENTLY “gate” your sound, which is sort of like a “you must be this tall to ride” sign for noises entering your microphone, with a slight high-pass filter to cut out some of the natural muddiness, that can lead you to the clean sound you’re looking for.
Just the tip of the iceberg when it comes to booth mistakes, but avoiding these will put you on the right path.
Looking to upgrade your studio space? Check out this article from SAV’s home studio expert, Ben Marney on the Such A Voice Blog.