Your home studio is quiet, your microphone sounds excellent going through your digital interface, and now your voice has transformed from an electrical signal in your brain, into a physical sound, back into electricity, in the form of digital information, and now you can actually see it on your computer screen. Woah.
Once the sound is on your computer, that’s what you’re working with: digital information in the form of a sound wave. As voice actors increasingly become their own engineers, it’s natural to wonder, “How do I make this sound incredible?”
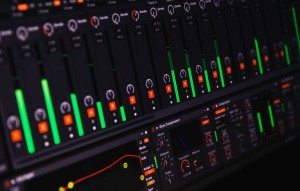
The software engineers who designed your Digital Audio Workstation or “DAW” have created hundreds of thousands of mechanisms to make sound beautiful called plugins. But as a voice actor, you don’t need thousands. 
You don’t even need ten.
As a self-engineer your objective is to make your sound clean, regular, and natural. And the secret to plugins that will help you achieve this, is that you’re always better off recording the sound through the plugin as opposed to altering your sound in post. That way the sound is already clean and doesn’t have to get cleaned.
Two plugins that will make your sound clean are a simple gate and equalizer (or EQ). A gate lets noises of a certain volume through, and not others. So if you have a quiet natural room tone that you don’t want interfering with your voice, you can adjust the gate to only let your voice through. You can make the gate gradual by slowing the attack and falloff rates. Adjust them to fit your environment and make sure your voice isn’t cutting out or jumping in.
EQ can work the same way for frequencies – as a voice actor the main frequencies you should generally avoid are bass frequencies. Every sound in the universe has some of every kind of frequency. Using an EQ highlights some and muffles others. That’s why I’d recommend a ‘hi-pass’ to cut off offending low frequencies that can muddy up an otherwise clean sound. As with all plugins, subtlety is key. So if your sound suddenly becomes very tinny, your high-pass is too high.
For regularity, audio engineers rely on compression. Compression looks at the loudest sounds and the softest sounds in a recording and brings them to around the same level. How does it know what’s going to sound good? You tell it what’s right by adjusting the ratio of loud to soft. If you’re unsure, I’ll stress this again: subtle is always better. So if you plan to add compression into your recording, a low ratio of 2:1 or 3:1 is going to sound much more natural than an over-processed 25:1. You know your compression ratio is too high if it sounds very fake, distorted, or just by looking at the sound wave – can you see the highs and lows or did you ‘pancake’ it so the whole thing is flat from top to bottom all the way through? The wave should always look like a wave, not a block.
It’s important to realize that your digital interface already compresses your sound a little bit before it ever makes it to your software, and the presets of compression or any other plugin are not made to the specifications of your voice, your booth, or your microphone, so you may have to fiddle with them to get it just right – so make your own presets!
A word of caution – normalizing” does not mean “making your sound normal,” but instead brings all sounds to a level you set. If you’re going to use it, make sure you set it to a level that sounds good, avoiding reverb and echoes.
From here, you can experiment with EQs to see if highlighting certain frequencies in your voice brings a little extra life to the sound, look into de-essers to reduce sibilance, de-clickers to get rid of pops and clicks, and explore the endless world of plugins beyond. But in the meantime, remember: good sound in means good sound out, so make your space, your equipment, and your voice the priority.
If you sound great and I can’t tell you’re using plugins, you’re doing it right.