In the first blog post in this series, we discussed the importance, location, and sound isolation of a home voice-over studio. Now that you have found a convenient space for your studio and are effectively keeping outside noise from coming into your recording, you want to turn your focus to sound absorption.
Sound travels at 767 miles per hour and when it hits a reflective surface, it bounces back and forth creating an echo or reverberation. Think about the echoing sound you hear when you sing in the shower, for example. While I’m sure you sound like a star, I’m also sure you don’t sound like a traditional voice-over. Sound absorption materials will keep your voice from bouncing around in your studio the way it does in your bathroom, giving you that nice “lively dead sound” you are going after. Some materials like acoustic foam, acoustic panels, and acoustic blankets are specifically designed for this purpose. However, you might already own a lot of materials that are fairly good at absorbing sound.
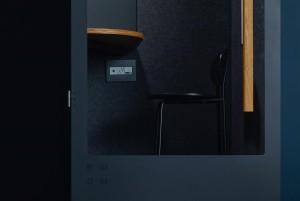
A helpful (if imperfect) metaphor for understanding reflective vs. absorptive surfaces is, “If it reflects light, it probably reflects sound. If it absorbs water, it probably absorbs sound.” Think about that same bathroom: all of that tile and porcelain reflects a lot of light! Other materials like metal, plastic, glass, computer screens, and some lacquered furniture are all common materials that reflect light. And, true to the metaphor, they also reflect sound. So, you want to avoid these materials in your studio as much as realistically possible. Conversely, a lot of common materials also absorb sound. Think about things that absorb water: comforters, towels, blankets, pillows, rugs, clothing, sleeping bags, cushions. All of this soft storage absorbs sound. This is another reason that having a home studio in a closet or storage room is so convenient, you can keep all of this soft storage in your studio with you, saving you space and money too!
In terms of how much sound absorption material you should put in your space, the more the better. Think about your space three dimensionally. Make sure you cover the walls, the ceiling, and the floor (carpeting, rugs, or mats do a good job of this.) Similar to what we discussed in the last blog post (it’s very difficult to actually make an air-tight space at home) it’s also difficult to put too much sound absorption into your home studio. It can be done and you can take a look at an anechoic chamber which is fascinating, a little creepy, and does a great job of deepening your understanding of sound absorption. But, you don’t have to worry about accidentally doing this at home.  eover studio
In addition to your soft storage, I recommend that you supplement your studio treatment with some acoustic foam, blankets, or panels to get the best sound. These are easily available at Sweetwater, Guitar Center, Amazon, and many other online platforms.
So, now you have a convenient place for your studio, you have proper sound isolation (keeping outside noise at a minimum) and you have acoustically treated your space (kept your voice from bouncing around too much in there,) now you want to diffuse that sound so it doesn’t sound too “boxy.”
You can compare sound diffusion to light diffusion. To go back to our metaphor from the last blog post, if you are shooting headshots you want a nice warm glow of light, not one harsh direct hit. The same goes for your sound. Because so many voice-over studios are in booths and closets( a lot of actors are literally doing their work inside of boxes) so it’s no wonder that it can sometimes sound a little “boxy!” Breaking up this boxy shape with soft storage and objects at different angles can help diffuse the sound. The traditional pyramidal shaped acoustic foam does a good job of this, as well as absorbing sound, so it’s a great investment.
Now that you are sounding great inside of your studio, you should work on lowering your noise floor. In simple terms, your noise floor is the sound of the silence inside of your studio. Most professional jobs ask for a noise floor of below -60db which is pretty quiet. There are a few simple ways that you can reduce your noise floor inside your booth.
First of all, if you can, get your computer processor outside of your studio. It can get pretty hot in your home studio and that can set your computer fan off and you definitely don’t want that sound in your recording. Next, you can make sure that you are using high quality gear and cables. Sometimes, sub-par gear can have a high “signal to noise ratio” which can sound like a hiss in your recording. Outside of your studio you might have to turn off your air conditioner while you are recording….and in some cases, even your refrigerator. Just don’t forget to turn it back on!
So, that’s an overview of how to make a fantastic sounding voice-over studio. Now, it’s finally time to ask the question that most folks ask first, “which microphone should I get?!” I have some thoughts on that, but in the meantime, check out this blog post from a couple weeks ago!


