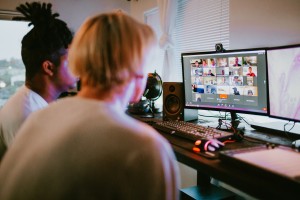
This week’s post is all about your home studio and some tips and tricks to help you get things running more smoothly and efficiently.
Home studios tend to come in two configurations:
- Those where you edit at the mic
- Those where you edit away from the mic
In my setup, I edit and produce at a desk in my office outside my booth, so I’ll start with tips on making this configuration work.

More screen real estate, less shuffling around windows while you’re editing.
Second ScreenIf your booth and edit desk are in separate rooms, you may likely need a second computer monitor for your booth. You can connect a second monitor with either a long cable, or, if you’re
on the Apple platform, you can use an Apple TV and connect your booth monitor wirelessly with Airplay. Depending on the length of your monitor cable run, you may need an in-line signal booster (or repeater), as each cable, depending on type (HDMI, VGA, etc) has a maximum length that you can reliably run a signal through.
For short-form work (auditions, commercials, explainers, etc.), typically I connect my booth monitor wirelessly in the morning, and then when I’m auditioning or doing project work, I hit “Record”, pull up the script on both monitors, step into the booth, do my takes, and come back out and do my editing and finishing work in Adobe Audition.
iPad, Wireless Keyboard, Wireless Mouse
In addition to the second screen, I use an iPad for long-form scripts when I’m doing punch-and-roll recording. For long-form work, I take my iPad – along with my wireless keyboard and mouse – with me into the booth. My iPad has my marked-up script (I use the iAnnotate app and an Apple Pencil to mark up my long-form scripts), and my booth monitor has Adobe Audition pulled up, controlled by my keyboard and mouse back to the Mac Mini at my desk.
And just where do I put all that gear in the booth? I keep an adjustable music stand that’s just big enough to hold the keyboard, mouse, mousepad, and iPad. I adjust the height so it’s super ergonomic and doesn’t take up much space at all. One last tip, if you use a music stand (or even a small shelf), throw a towel or other sound absorbent cloth over it so your mic doesn’t pick up reflections off the surface.
Headphones
Because my MacMini and Apollo Twin interface are both at my desk, I use a simple headphone splitter with my audio interface. If I’m at the desk, I plug into one side. The other side has a long headphone cable that runs through the wall into the booth. I typically don’t work with headphones at the mic unless I’m doing live sessions or long-form content where I need to punch-and-roll. Also handy for my headphones in the booth are an inline volume control and Cough Blox cough button.
Pro Engineer
Regardless of whether you edit at the mic or not, I highly recommend hiring a professional audio engineer to evaluate your audio and make recommendations to improve the treatment of your space. This typically costs a couple of hundred bucks but understand that the single biggest contributing factor to the quality of your audio is your recording space. Your mic and your gear are simply a mirror. Great gear makes a good space sound great and a bad space sound awful. For the cost of one explainer video, your space can often go from awful to good or good to great.
Hiring a pro engineer can be done remotely. Typically, the engineer will walk you through their process, which usually involves sending them photos or video of your booth, a recording of a specified length of your voice, and a specified length of room tone. The engineer will analyze your recordings and make some recommendations to improve and dial in your space.
Fan Noise
If you edit at the mic, which likely requires your computer to be in the same room as the mic, you’ll need to make sure that one of three things happens:
- Your computer has no fan, and therefore no fan noise.
- Your computer has sufficient hardware (usually memory) that the fan doesn’t kick on while the computer is in routine use, or
- Your computer is kept in a cabinet to contain the fan noise. Note that the cabinet can often trap the heat the computer is trying to shed and may lead to overheating your computer.
Phone Noise
As a general rule, keep your cell phone several feet away from your mic. The radio signals from your phone can often cause audible noise in your microphone.
Put It in the Cloud
I use Google Drive to store my files for several reasons. Here’s a great example: Literally yesterday, on a Sunday, a client called freaking out because an audio file I sent him was corrupted and the project was due Monday (today). I was a half-hour away from home. But no sweat. I pulled up the file on Google Drive on my phone and sent him the link within seconds. Storing your work files in the cloud is super secure and allows you flexibility. Had my files been only on my hard drive, I would have had to drive an hour round-trip back home to service this client rather than the seconds it took to send him the link. Look into Google Drive, iCloud, DropBox, or any of the reputable providers.
Invest Over Time
My last tip is this: look at your home studio as an investment. The more efficiently you can work and the better your audio quality, the more money you stand to make. That said, newer talent should NOT be dropping thousands on top-end gear. Start with your space, which can often be treated with moving blankets and mattress toppers. Begin with basic pro gear, then upgrade piece-by piece over time as your experience and skill levels evolve (and always evolve your skills with coaching). Your main mic today may be your backup/road mic tomorrow.
Wishing you all the best in everything you do.
Check out our free PDF with pro-tips from real working voice-over actors here!
Want to learn more about voiceover? Signup for our introductory VO webinar.


